
Common Metalworking Techniques: A Beginner's Guide
Table of Contents
Last Updated: October 20,2026
What Metalworking Techniques Do Beginners Need to Know?
Metalworking techniques are the methods used to cut, shape, join, and finish metal. For beginners, the most useful starting points are cutting, forming, joining, and finishing, these four cover most small-shop and jewelry work.
At Alene's Adornments, I’ve spent 16 years shaping copper, sterling silver, and gold. Below, I show you how each works, when to reach for it, and how to stay safe.
Knowing which technique fits your material and goal matters more than owning every tool.
Here's the short version:
- Cutting separates metal into shapes
- Forming bends, hammers, or casts it into form
- Joining connects pieces together
- Finishing smooths and polishes the surface
Metal Cutting Tools for Jewelry Making and General Fabrication
Cutting tools for jewelry making range from hand snips to laser cutters, depending on metal thickness, precision needed, and budget. Start with hand tools, they're cheap, quiet, and teach you control.
Hand Cutting Tools: Snips, Hacksaws, and Cold Chisels
Hand tools handle most thin-sheet and wire work. Snips cut sheet metal up to about 20 gauge, a jeweler’s saw slices rod and tubing, and a sheer works best for heavier thicknesses. A common mistake is forcing dull snips through thick sheet, which bends the metal and ruins your cut line. Swap blades often.
- Snips: straight and curved cuts in sheet
- Jeweler’s Saw: rods, tubing, and thicker stock
- Cutting Sheer: works on steel and heavier metals
- Files: clean up rough edges after cutting
Power Cutting: Shears, Saws, and Laser Cutting
Power tools speed things up once you know the basics. Electric shears cut long straight lines, a motorized jeweler's saw handles curves, and laser cutting gives clean, precise shapes from a CAD file.
Occupational Safety and Health Administration guidance on machine guarding covers the basics of keeping hands clear of blades.
Jewelry Metal Forming Techniques: Shaping Metal by Hand and Machine
Jewelry metal forming techniques shape metal without removing material, you push, bend, or pour it into form, turning a flat sheet into a cuff or a ring.
Bending, Hammering, and Forging
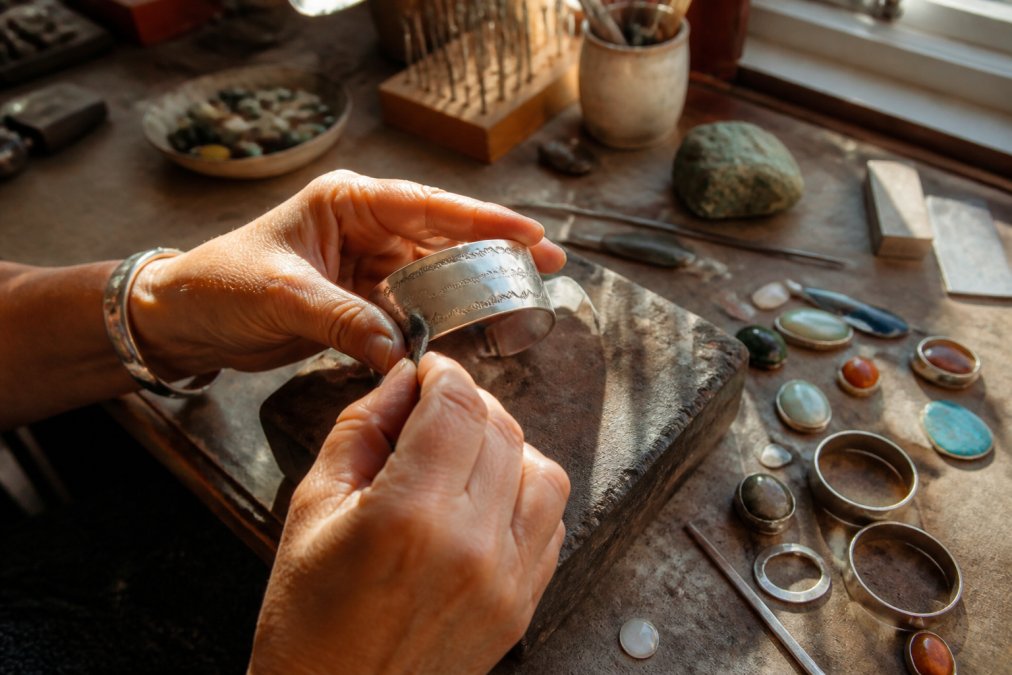
Bending is the simplest forming method: work metal around a mandrel or form block. Hammering adds texture and hardens the surface, while forging uses heat and repeated blows to shape heavier metal. a process called fold forming creates gorgeous designs.
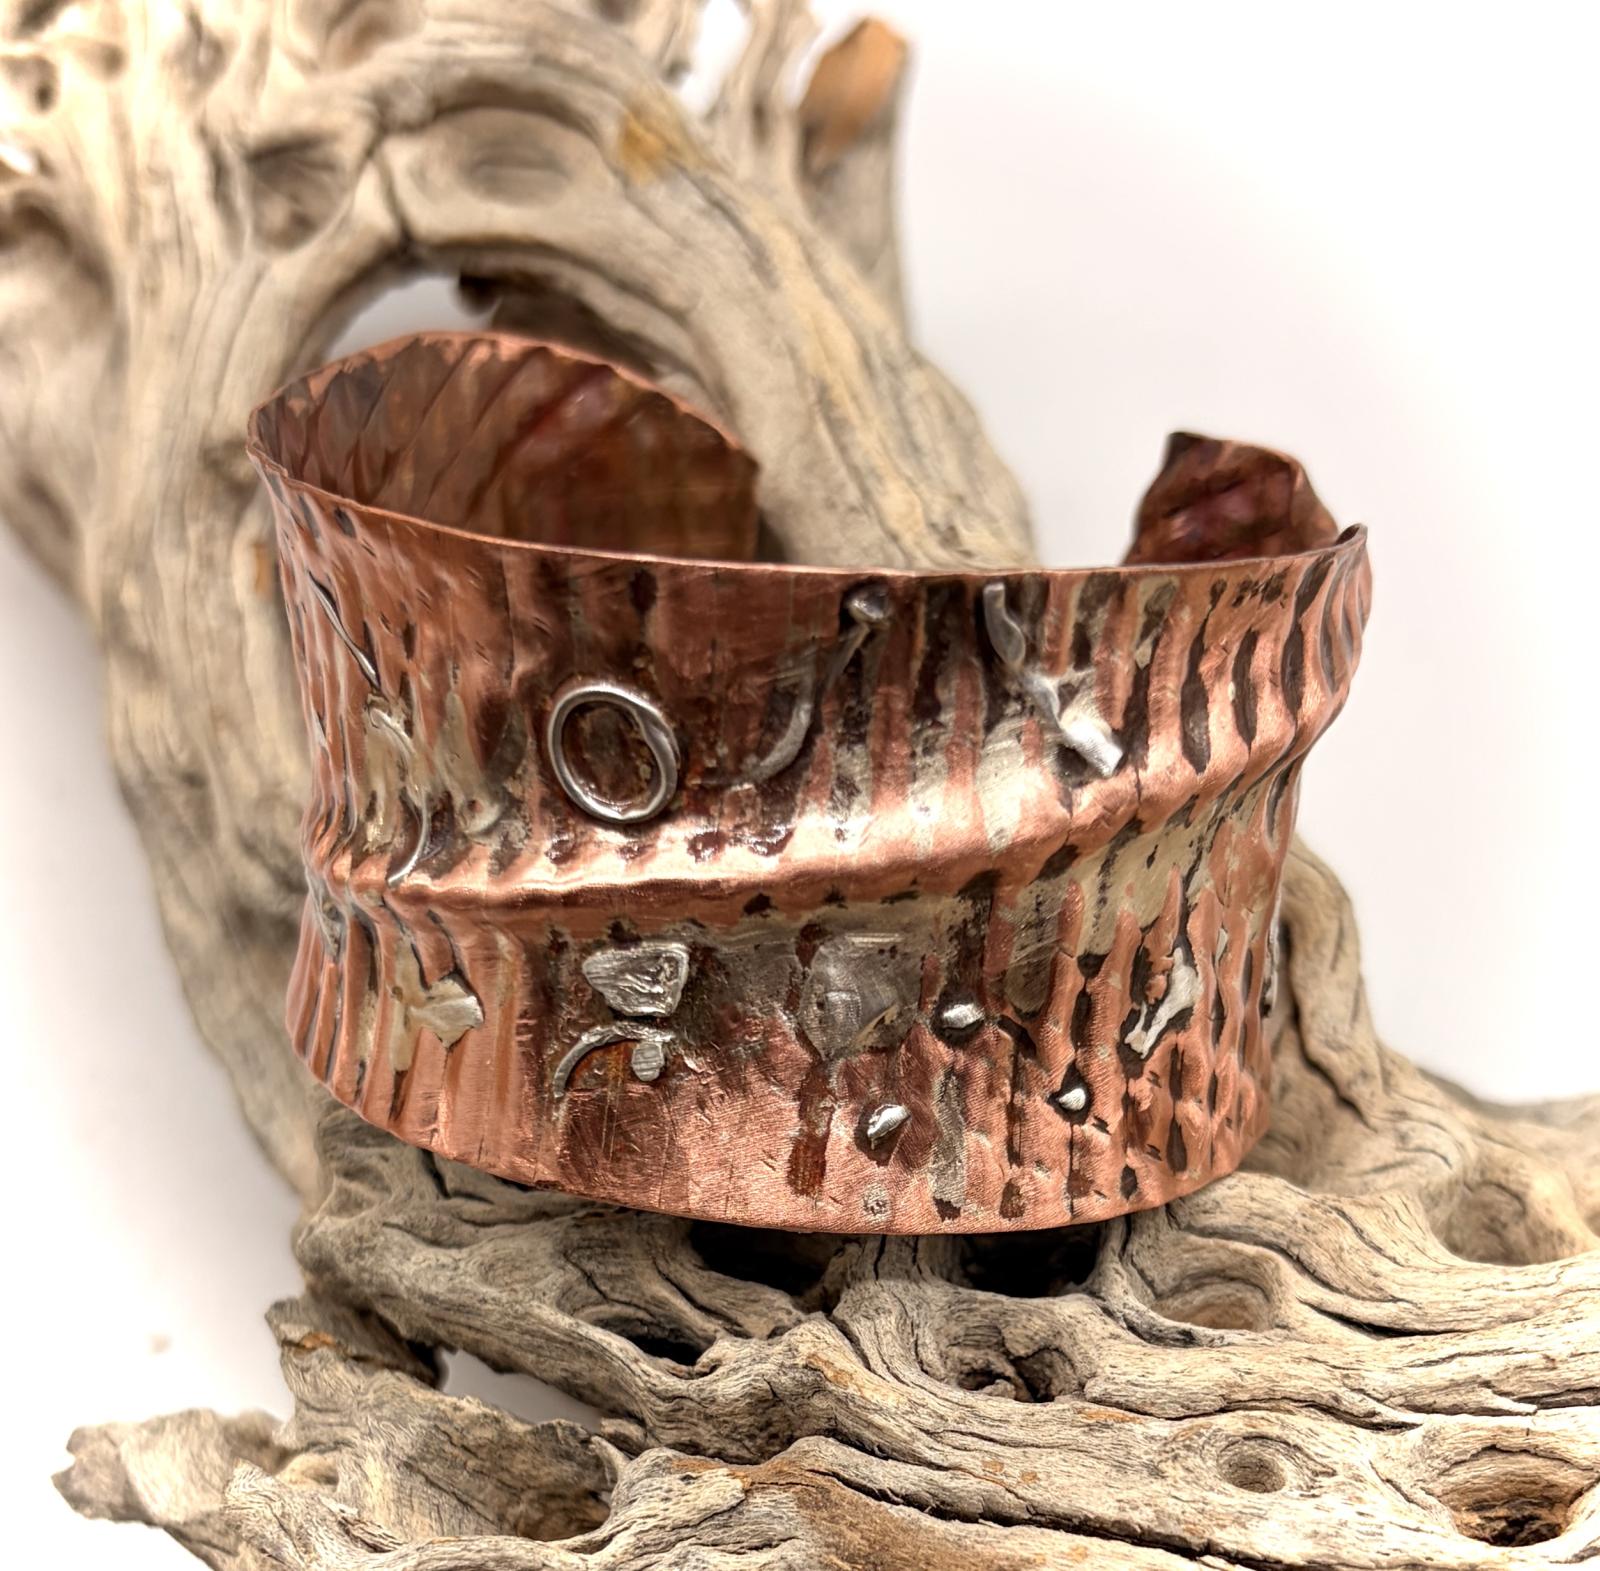
For a cuff, we bend copper around a mandrel, then hammer the surface for texture. That's how a piece like our Dare to Dream copper and sterling cuff bracelet gets its shape and finish.
Casting and Stamping
Casting pours molten metal into a mold; stamping presses a design into sheet metal with a die. Casting suits complex shapes you'll repeat, stamping flat decorative patterns.
Both need more setup than hand forming. Start simple. As a jeweler I prefer the hand forming method.
Metal Stamping Techniques for Decorative and Functional Work
Metal stamping techniques press designs into metal using a die or hand stamp, adding letters, patterns, or textures in seconds. Line up your stamp, hold it steady, and strike: a light first tap sets position, a firm second strike makes the mark.
Stamping works best on annealed, soft metal. Hardened metal cracks or blurs the design.
Joining Metal: Welding, Soldering, and Fusing
Joining metal connects two pieces into one. Soldering uses a lower-melting filler, and fusing melts silver until it flows and bonds without filler. For jewelry, soldering and fusing are the workhorses.
Fusing is my favorite for organic designs. In our Sacred Spiral earrings, copper is textured and fused with sterling silver, so no two pieces look alike.

- Soldering: strong, precise joints
- Fusing: seamless, organic bonds
Heat control decides success: too much melts your piece, too little and the joint fails.
Metal Polishing and Finishing Techniques for a Professional Look
Metal polishing and finishing techniques smooth the surface and remove scratches, separating a rough handmade piece from a professional one. Work through grits coarse to fine, skip one and you'll chase scratches forever.
- Grinding: removes heavy marks
- Sanding: smooths the surface
- Polishing: brings up shine
- Deburring: removes sharp edges
Copper needs a protective treatment to hold its finish and slow oxidation, which is why I treat my copper pieces.
'Dare to Dream Collection' Copper and sterling cuff bracelet →
Machining, Drilling, and Material Removal
Machining removes material with a cutting tool to produce a precise shape. Unlike forming, which moves metal, machining takes metal away, the go-to when you need tight tolerances, flat faces, or holes in exact locations. Drilling is a common machining operation in a small shop.
Speeds, Feeds, and Why They Matter
Cutting speed is how fast the tool edge moves past the metal, measured in surface feet per minute; feed is how far the tool advances per revolution or per tooth. Get these wrong and you get burned edges, broken drills, or a work-hardened surface. Run softer metals faster and harder metals slower: aluminum tolerates high spindle speeds and aggressive feeds, mild steel runs slower, and stainless runs slower still and work-hardens if the tool rubs instead of cuts. Copper and brass cut freely but grab the drill, so back off the feed as the bit breaks through.
Workholding and Layout
A part that moves will ruin the cut and can throw the workpiece, so clamp it, a drill press vise, milling vise, or C-clamps all work. Never hold a part by hand under a spinning cutter. Layout comes first: a center punch marks the hole location, a scribe and machinist's square set the line, and a tap drill chart tells you which drill diameter matches your thread. Measure twice, punch once, drill once.
When Machining Beats Cutting or Forming
Choose machining when:
- The part needs a hole in an exact location, not an approximate one
- The surface must be flat or the diameter must be round within a few thousandths
- You are removing a small amount of material from a nearly finished part
- The material is too thick or too hard for snips, saws, or hand forming
Choose cutting or forming instead when the shape is simple, the tolerance is loose, and the part is thin. Hand snips and a hacksaw beat a mill on cost and setup time for one-off thin-sheet work.
Quality Checks After Machining
Inspect before you move on: check hole diameter with a pin gauge or calipers, check position against your layout, and run a finger along the edge, a burr means the cut isn't finished. Deburr with a file, countersink, or deburring tool before the next operation.
Common defects to watch for:
- Oversized holes: worn drill, wrong drill size, or chatter from poor workholding
- Out-of-round holes: dull drill or too much feed pressure
- Work-hardened surfaces: tool rubbing instead of cutting, usually from too light a feed on stainless
- Burrs and raised edges: normal after drilling; remove them every time
- Tapered holes: drill wander from a missing center punch or a flexing bit
For jewelry work, drilling is usually the only machining operation you need. Clean holes for ear wires, jump rings, and settings come from a center punch, a sharp bit, a slow feed, and a drop of lubricant. The rest of this section matters most once you move into fabrication and repair on larger parts.
Safety Procedures and Workshop Setup for Metalworking Techniques
Safety is not one checklist. Each process throws a different hazard at you, and the control that saves your eyes at the grinder won't save your lungs at the soldering bench. Match the protection to the process.
Hazards and Controls by Process
Cutting (snips, hacksaws, chisels). The hazard is the cut edge and the flying sliver, sheet metal edges slice a finger before you feel it.
Grinding, sanding, and polishing. The hazard is sparks, dust, and the wheel itself.
**
Soldering and fusing. The hazard is fumes from flux and hot metal.
Machining and drilling. The hazard is the spinning tool and the chips. Never wear gloves near a drill press, lathe, or mill, a glove can catch and pull your hand in.
Finishing and chemical treatments. The hazard is the chemical itself. Patinas, pickling solutions, and protective coatings can burn skin and eyes and give off fumes.
Workshop Setup That Prevents Accidents
- Work height: set the bench so your work sits at about elbow height. Too low and you lean into the tool; too high and you lose control.
- Lighting: point light at the cut line, not at your eyes. Shadows hide the edge you are about to cut.
- Tool placement: keep the tools you are using within reach and everything else off the work surface. A cluttered bench is where hands meet blades.
- Ventilation: solder, weld, and finish near an open window, a fan, or a fume extractor. Pull fumes away from your face, not across it.
- Fire safety: keep a fire extinguisher rated for the materials you work with, and know where it is without looking.
- Electrical safety: use grounded tools, inspect cords for damage, and keep cords away from water and hot metal.
Personal Protective Equipment, Process by Process
Process |
Eyes |
Hands |
Lungs |
Body |
|---|---|---|---|---|
Cutting |
Safety glasses |
Cut-resistant gloves |
Not usually needed |
Closed shoes |
Grinding / sanding |
Face shield over glasses |
Gloves off near the wheel |
Dust mask or respirator |
No loose clothing |
Welding |
Welding helmet, correct shade |
Leather gloves |
Ventilation or exhaust |
Leather jacket, closed shoes |
Soldering / fusing |
Safety glasses |
Tweezers or picks |
Ventilation |
No loose sleeves |
Machining / drilling |
Safety glasses |
No gloves |
Not usually needed |
Tie back hair and sleeves |
Finishing / chemicals |
Safety glasses or goggles |
Chemical-resistant gloves |
Ventilation |
Apron |
Start with hand tools, add power tools as you grow, and never skip the safety gear. The habit you build on the first cut is the habit you keep on the thousandth.
Frequently Asked Questions
What are some common metalworking techniques?
Common metalworking techniques include cutting, forming, joining, machining, and finishing. Cutting uses tools like snips and hacksaws to shape metal. Forming involves bending or forging to create shapes. Joining methods include soldering and fusing. Machining removes material with drills, while finishing techniques like polishing and grinding smooth the surface. Each technique suits different projects, from large-scale fabrication to delicate jewelry.
Which metalworking techniques are used to make jewelry?
Jewelry makers rely on forming, cutting, joining, and finishing techniques. Forming shapes metal through hammering or bending. Cutting uses fine saws or snips for precise shapes. Joining often involves soldering or fusing, as seen in copper and sterling silver cuff bracelets. Finishing techniques like polishing and deburring give pieces a smooth, wearable surface. These methods allow artisans to create one-of-a-kind designs with materials like copper, silver, and gemstones.
What safety equipment is needed for metalworking?
Safety gear for metalworking includes safety glasses, hearing protection, gloves, and a respirator when cutting, grinding, or polishing. Wear flame-resistant clothing for soldering. Ensure proper ventilation to avoid fumes. A fire extinguisher should be nearby when using heat. For hand tools, secure the workpiece with clamps to prevent slips. Always read tool manuals and follow OSHA guidelines for workshop safety.
What is the difference between forging and casting?
Forging shapes metal by heating and hammering it into form, which strengthens the material through compression. Casting pours molten metal into a mold to create a shape, allowing complex designs but often requiring finishing work. Forging is common for tools and jewelry that need durability, while casting suits detailed or hollow forms. Both are fundamental metalworking techniques, but they use heat and pressure differently.